

Hi everyone!
I know I missed blogging yesterday, but let me tell you that you will not be disappointed with today's post!
I am going to show you step-by-step how I am going to make chalkboard glasses for our wedding as favors for our guests.
Let me first say that if you are someone that follows directions to a tee you are going to be horrified by how I do projects!
I stink at following directions, especially when it comes to crafts. I don't like to measure, I cut things where I think they should be cut, and I don't always use the materials that you should.
Let's just say, that some things work and out some things don't, but it is ALWAYS an adventure!
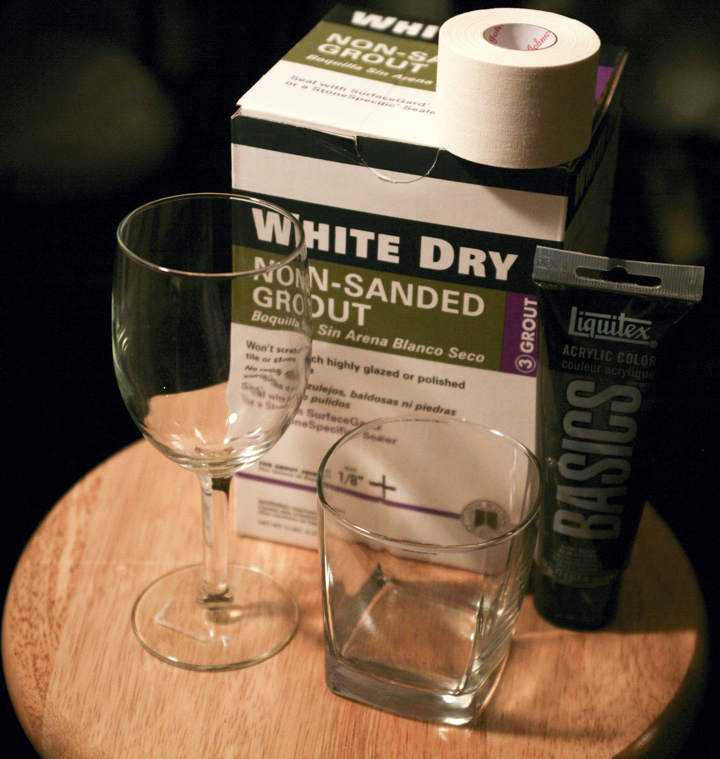
So here are the ingredients that I am using:
White Dry Non-Sanded grout that can be bought at any hardware store
Acrylic Paint (I chose black but it can be any color)
Glasses (I bought mine for 97 cents at Walmart!)
Tape to make the square or shape on the glass (I couldn't find our painters tape so I am actually using medical tape)
 The first step is to tape off the shape on the glasses to be able to paint the chalkboard paint.
Using my medical tape I cut strips and put them onto the glasses in a square, overlapping. I think you could probably do it in any shape and I am thinking maybe a heart might be cute?!
 I think with painters tape or masking tape it would be easier to get straight edges, but I work with what I have!!
Next step was to mix up the chalkboard paint.
The original recipe called for :
1 cup paint
2 tablespoons Dry White Non-Sanded Grout
I was only doing two glasses so honestly I squirted some paint into my bowl (acrylic black) and poured some grout on top.
 The next step is to stir the paint together, and it seems the most important rule is to try and get out all of the big lumps.
 I then painted the mixture onto the glasses, pretty thick so it would cover completely, because one of the last steps is to sand it down so that it is ready to use with chalk.

 Now, I need to let the paint air dry (you could probably use a hair blower if you want), but I need to go cook dinner, so we will finish the tutorial hopefully tomorrow!
Hope you enjoyed it and it was easy to follow!
Love,
Jess
I know I missed blogging yesterday, but let me tell you that you will not be disappointed with today's post!
I am going to show you step-by-step how I am going to make chalkboard glasses for our wedding as favors for our guests.
Let me first say that if you are someone that follows directions to a tee you are going to be horrified by how I do projects!
I stink at following directions, especially when it comes to crafts. I don't like to measure, I cut things where I think they should be cut, and I don't always use the materials that you should.
Let's just say, that some things work and out some things don't, but it is ALWAYS an adventure!
So here are the ingredients that I am using:
White Dry Non-Sanded grout that can be bought at any hardware store
Acrylic Paint (I chose black but it can be any color)
Glasses (I bought mine for 97 cents at Walmart!)
Tape to make the square or shape on the glass (I couldn't find our painters tape so I am actually using medical tape)
Using my medical tape I cut strips and put them onto the glasses in a square, overlapping. I think you could probably do it in any shape and I am thinking maybe a heart might be cute?!

Next step was to mix up the chalkboard paint.
The original recipe called for :
1 cup paint
2 tablespoons Dry White Non-Sanded Grout
I was only doing two glasses so honestly I squirted some paint into my bowl (acrylic black) and poured some grout on top.


Hope you enjoyed it and it was easy to follow!
Love,
Jess
No comments:
Post a Comment